Showing posts with label mini album. Show all posts

2/18/2014

It's A Charmed Life!

It's my turn today on the Simple Stories blog and I have a super adorable mini album to share! First, let me start off by saying that I LOVE Simple Stories NEW "A Charmed Life" collection. This one is right up my alley, the colors are perfect, the elements are perfect, and I just adore all of the sweet sentiments. 

I have been hanging on to this little Maya Road Chipboard/Acrylic stand album for a while, but decided to finally put it in use. I needed a new piece to sit on my desk. 

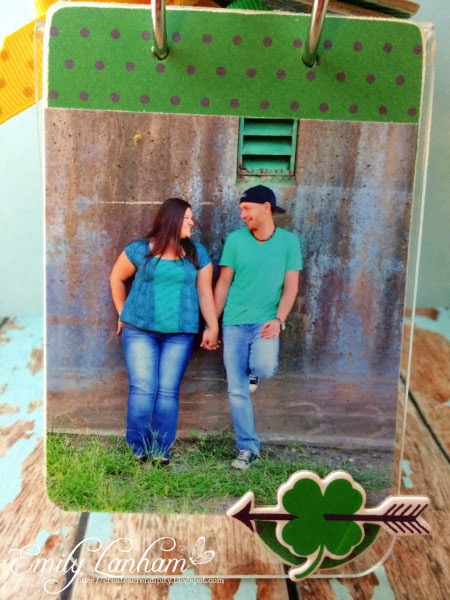
My husband and I got anniversary photos taken this past year, so I wanted to have them on display for sure! I take every opportunity that I get to have a photo session. The end results are a fun time and amazing photos that last a lifetime. These did not let me down. We had a blast with this photos session! 

The sun was so bright that morning so we couldn't get a ton of photos down by the river, but I adore this one. That's the great Ohio River for those of you wondering.

Here's a few pages from the inside. I used some of the Sn@p cards on the top pages because I loved the sentiments and these little cards fit perfectly. 
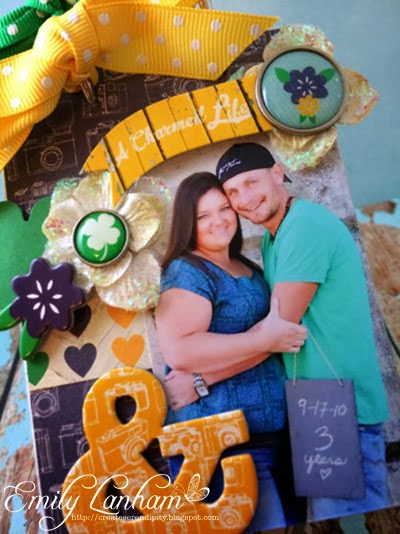
Another element from this collection that I love are the little chipboard stickers. They give some nice dimension to projects and they are just adorable!

Here's the album from the side.... if I would have put anything else on it, I believe it would fall over! 
Thanks for stopping by today! 

Products Used:
Simple Stories: A Charmed Life 
6x6 Paper Pad #3722
Bits & Pieces #3729
Chipboard #3728
Brads #3727
Insta Squares #3730
Sn@p Cards #3723
Maya Road- Acrylic Album
Petaloo- Velvet Hydrangeas
May Arts- 5/8' Grosgrain Dots: DD57, DD15; 3/8" Metallic Velvet 377-38-55

11/14/2013

Give Thanks Fall Mini Album

I LOVE love love the Pumpkin Patch stack from DCWV! To me, Fall paper isn't fall paper without purple, and this one has the nice rich purple to tie it together. 

I decided to try a Fall mini album with this stack. I got the Creative Book Pages 1 & 2 dies from Spellbinders and felt the need to combine them for this fun mini! 

Aren't the colors PERFECT?

First, I started out by cutting a few of the book pages from the dies. I cut some chipboard (cereal boxes work GREAT for this!) and then cut 2 patterned papers for the front and back of each page. 

After I glued the album together, I chose some coordinating inks and inked the edges of my pages.

A mini album isn't complete without some lovely May Arts Ribbons adorning the binding rings!

For the flowers, I used a few different Spellbinders spiral flower dies. 

Here's a peek at the inside.


Thanks for stopping by today!

Products Used:
DCWV- Pumpkin Patch Stack
Spellbinders- Creative Book Pages 1 & 2, Bitty Blossoms, Spiral Blossom One
May Arts Ribbon- SE30, 373-58-47, AF44
Imagine Crafts/Tsukineko- Memento Dew Drops: Morocco, Bamboo Leaves, Sweet Plum, Rich Cocoa

9/13/2013

DCWV Glam Rock Mini Album


I LOVE bright colors as I am a very colorful person. When I received the Glam Rock Stack from DCWV, I was very excited to see a stack full of such fun colors. 

Here's a look at the stack cover.

I decided that I wanted to make a mini album with this stack because I wanted to incorporate lots of different ribbons to pull in the pretty colors. 

I also made a little step by step to show you how to re-create this project:

Gather your supplies. You will need a Basically Bare Tiny Tabs mini album, patterned paper, and some ribbon.

I love this mini album because it’s small enough to fit wallet photos in and it has these really neat tabbed acrylic pages.

Cut your paper to fit the album. For this album I cut them down to 2 ¾ x 5 inches.

Adhere your paper to the pages.

Cut out shapes from the cut apart sheet in the stack.

Once you get the extra pieces cut and placed on your cover, add coordinating ribbon to the spine. 


Once you have all of the ribbon added, you can add some gem stickers to add a little dimension.


I cut some tabs out of patterned paper to add to the inside tabbed pages.


Add the tabs & left over gem stickers to your acrylic pages. 

Thanks for stopping by!


Products Used:
DCWV- Glam Rock Stack, Star Gem Stickers
Basically Bare- Tiny Tabs Album
May Arts- 443-58-28, 382-34-46, FN27, 377-38-10, 377-38-15, 444-58-22, SM46, SM27

7/17/2013

A Little Bit of Sweetness


I have fallen IN LOVE with Authentique's new "Sweetness" collection! When I first saw it, I knew I had to dig up as many pics of my daughter eating ice cream as I could find. There weren't many, but I made it work! 

Along with this beautiful paper, Imagine Crafts Creative Medium and Memento & Versamark inks go hand in hand! Let me show yo uhow!

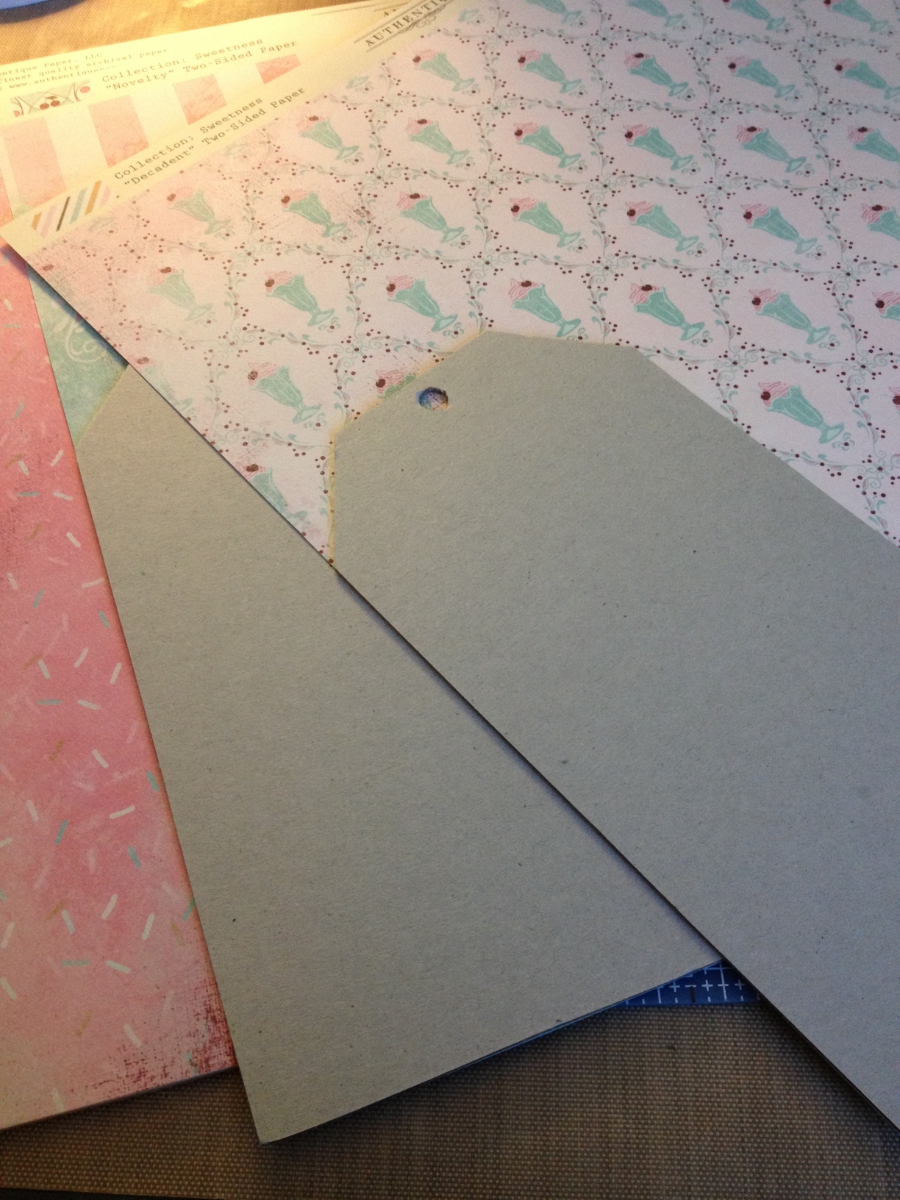
I started out with this Maya Road Shipping Tag album. It's a really nice heavy chipboard and comes with a binding ring attached to the top. 

Glue your papers to the album pages (front and back).

Cut your pages out. I use a razor knife for precision. 

Sand the edges. You can also ink the edges if you want, I left them plain, I liked the rough look from sanding.

I decided to try something with this album that I've never tried before.... I added some Creative medium (in Sparkle) to all of m pages. This just gives an extra protective coat as well as a nice shimmer (goes really well with this paper!)

Once all of the pages are covered with Creative Medium and dried, you can attach the ring and start to embellish. 

I took some of the little cardstock die cuts and also covered them with Creative Medium. I just like the added protection that it gives, especially on the embellishments that I would be putting on the cover. 

For the rest of the embellishments, I used Memento and VersaMagic inks to add a pop of color to the edges.

And Viola! There you have it, my super sweet mini album! 

Another cool tip with this album... I completed it by only using 3 of the 12x12 double sided papers from this collection along with the 12x12 Enhancements sheet and Components die cuts. I hate to have large scraps, so I used it all up! 

I added photos of my daughter from over the years, this one is one of my favorites. I printed all of the photos in Sepia just to match the vintage look of the paper. 

Here's a peek at the entire album.


How could I not resist adding the oh so popular "Keep Calm" sign to the back? It was the perfect finishing touch!

Thanks for stopping by today!

Products Used:
Imagine Crafts- Creative Medium- Sparkle, Memento- Angel Pink, VersaMagic- Aquatic Splash
Authentique Paper- "Sweetness" Collection
Maya Road- Shipping Tag Mini Album
May Arts- Ribbon
Petaloo- Flowers & Trims
ZVA- Creative Bling

6/03/2013

May Arts Design Team Call Submission

Have you heard the news? May Arts is having a design team call! This has honestly been one of the best design teams that I've had the pleasure of being on, so re-applying wasn't even an option for me, it is was something that I HAD to do! I have enjoyed working with The Ribbon Lady (Bethney) as well as the rest of the talented team, and not to mention the FABULOUS ribbon! I'm hoping to get to come back for round 2! 

Here are a few of my favorite projects that I have created with May Arts Ribbon products. Seriously, it's the ONLY ribbon you should own, hands down the best on the market! 


And here is a link to one of my all time favorite tutorials that I did for May Arts (this was my Round 2 submission last year), I hope I make it to Round 2 this year! I have lots of ideas swirling around in my head! 

Thanks for stopping by today!

If you are looking for the May Arts DT Call, CLICK HERE

Good luck to everyone entering!